When using Mobilink for file transfers, the names of the two devices will be displayed in each other's device list once a connection is established. Users can set or change these device names as needed to better manage and identify their devices. Here are the detailed steps to set the Mobilink device name on both your computer and mobile phone.
Set device name on the computer device:
Whether you are using a Windows, Linux, or macOS computer, the process for setting the Mobilink device name is similar. Follow these steps:
Step 1: Launch the Mobilink Application
First, launch the Mobilink application on your Windows, Linux, or macOS computer. If you haven't installed Mobilink yet, visit the official website to download and install the latest version of the application.
Step 2: Navigate to the Setup Page
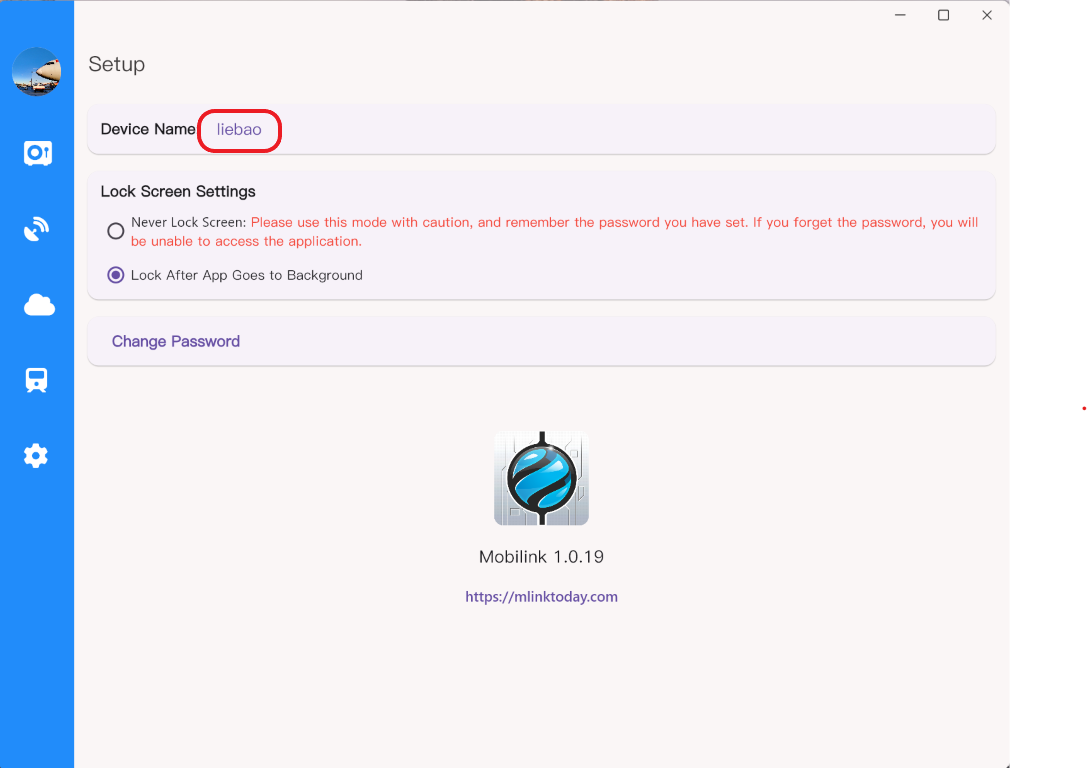
After opening the Mobilink application, click on the "Setup" option on the main interface. This option is usually located at the top right corner of the application or accessible through the menu bar.

Step 3: Click on the Device Name Field
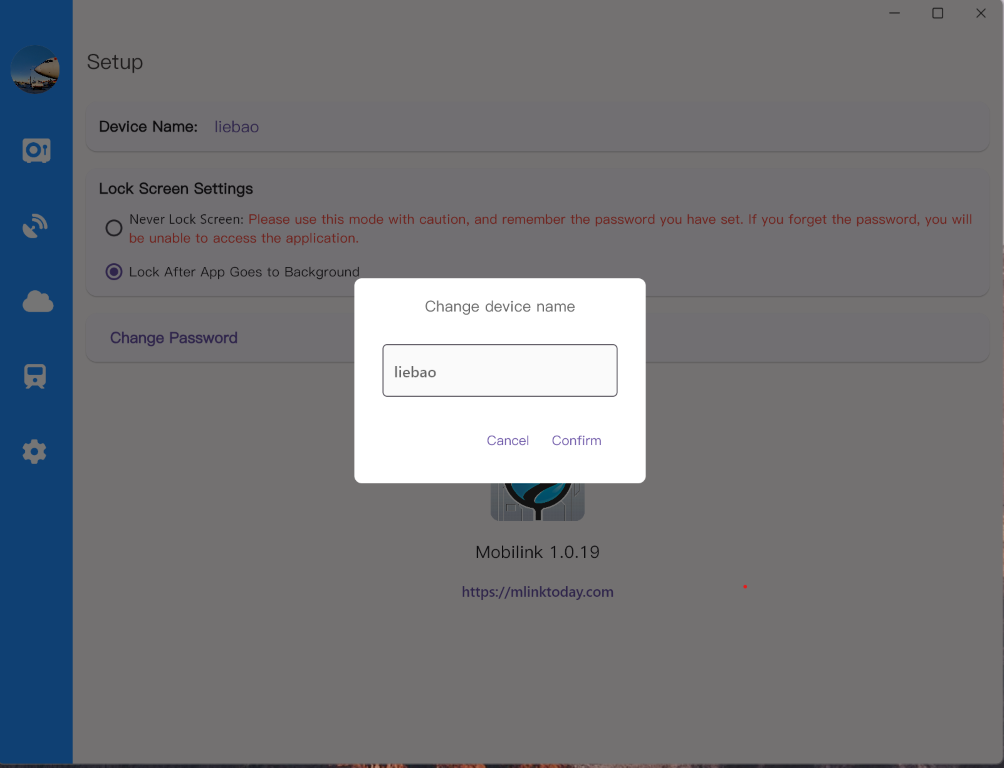
On the setup page, find the device name field. It typically displays the current device name. Click on the content of this field, and a dialog box will pop up, allowing you to enter a new device name.
Step 4: Enter the New Device Name
In the pop-up dialog box, enter the new device name you want to set. Make sure the name is clear and easy to recognize.
Step 5: Confirm the New Device Name
After entering the new device name, click the "Confirm" button in the dialog box. The new device name will be saved and applied to your Mobilink application. Now, your device will appear with the new name in the Mobilink list on other devices.

Set device name on the mobile phone:
You can also easily set the Mobilink device name on your mobile phone. Whether you use an Android device, follow these steps:
Step 1: Launch the Mobilink Application
Launch the Mobilink application on your mobile phone. If you haven't installed Mobilink yet, download and install the app from the Google Play Store.
Step 2: Navigate to the Setup Page
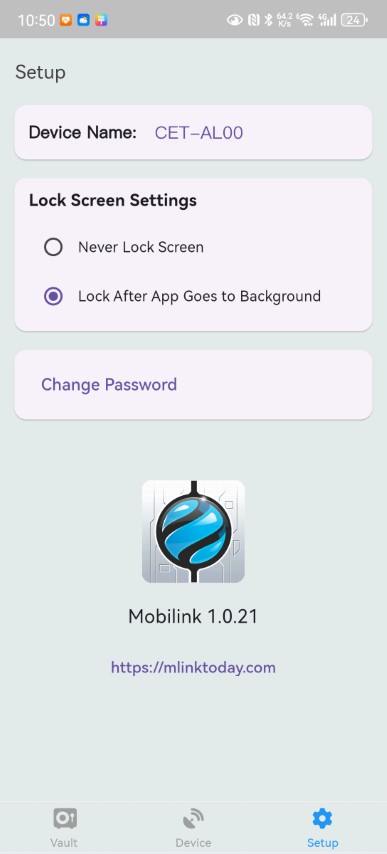
After opening the Mobilink application, click on the "Setup" option in the bottom or side menu. This will take you to the setup page.

Step 3: Click on the Device Name Field
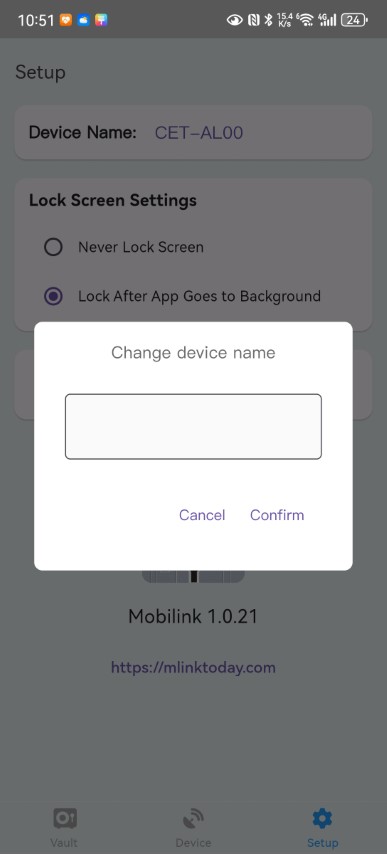
On the setup page, find the device name field, usually displaying the current device name. Click on this field's content, and a dialog box will pop up, allowing you to enter a new device name.
Step 4: Enter the New Device Name
In the pop-up dialog box, enter the new device name you want to set. Ensure the name is clear and easy to recognize.
Step 5: Confirm the New Device Name
After entering the new device name, click the "Confirm" button in the dialog box. The new device name will be saved and applied to your Mobilink application. Now, your device will appear with the new name in the Mobilink list on other devices.

Benefits of Setting the Device Name
Setting a custom device name has many benefits:
- Ease of Identification: Custom device names make it much easier to manage multiple devices and quickly find a specific one among many.
- Increased Efficiency: In an office environment or at home, having multiple similar devices with custom names can help users quickly select and connect to the correct device.
- Personalized Experience: Users can name their devices according to their preferences, enhancing the personalized experience of using Mobilink.